There is something endlessly captivating about the night sky — the sweep of the Milky Way, the soft glow of nebulas, the quiet order of constellations. While galactic ceiling murals have traditionally been the preserve of themed hotels and planetariums, this stunning home décor idea is increasingly making its way into bedrooms, children’s rooms and creative living spaces.
With the right paint, a long weekend and a little patience, you can recreate the splendour of the cosmos right above your bed. Here is how to do it in six steps.

Source: Jeremy Thomas — Unsplash
1. Choose the Right Paint: Phosphorescent (Glow-in-the-Dark)
The secret to a galactic ceiling that does not overwhelm your room during the day is phosphorescent paint — commonly known as glow-in-the-dark paint. This type of paint absorbs light during the day and emits a soft, ethereal glow after dark, meaning your galaxy only truly comes alive when the lights go off.
This approach gives you the best of both worlds: a ceiling that looks perfectly normal — or even blank — in daylight, and a breathtaking cosmic scene the moment you switch off the lamp. You will also have far more freedom when choosing the colour scheme for the rest of your room, since the ceiling will not compete visually during the day.
Phosphorescent paint is available in several colours including white, blue, green and violet. Mixing colours allows you to create the swirling hues of nebulas and distant galaxies.
2. Gather Your Materials and Prep the Space
This project is best spread across a long weekend — one day for preparation and base layers, and another for the detail work. Rushing either stage will show in the final result.
Materials you will need:
- Phosphorescent paint (multiple colours if possible)
- Paint roller and brushes (various sizes)
- Old toothbrush or dry paintbrush (for flicking star effects)
- Sponges
- Protective gloves
- Pencil
- Painter’s tape
- Plastic drop cloth or old newspaper
- Constellation reference photos (optional — NASA’s website is a free and excellent resource)
- Star stencils (Optional)
- Wall sealer
Before you start, protect all furniture by covering it with old cloth or plastic sheeting. Lay drop cloths or newspapers across the entire floor — paint will drip from the ceiling throughout this project. Wipe the ceiling with a dry dust cloth to remove any dust, cobwebs or loose debris that could interfere with paint adhesion.
If you are applying this over a previously painted ceiling and notice any signs of mould, treat the affected areas with Nippon Paint Anti-Fungus Solution before proceeding. Apply it to the surface, leave it for at least two hours, then allow the ceiling to dry fully.
3. Paint the Galactic Backdrop
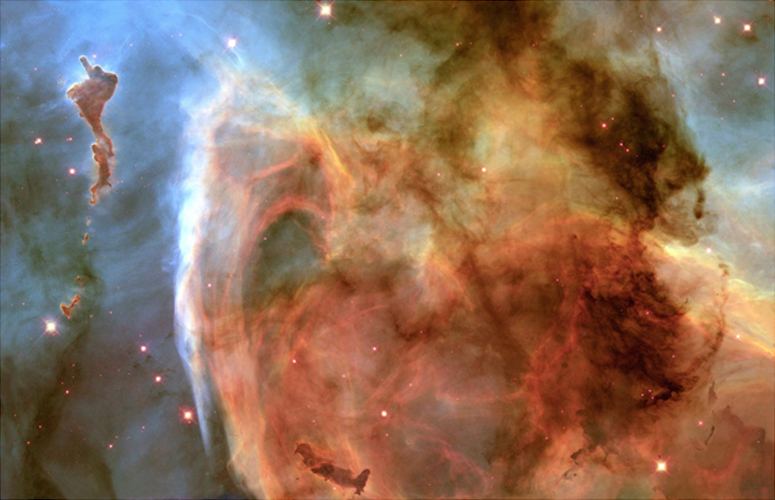
Source: NASA — Unsplash
With your preparation done, begin with the broad strokes — the sweeping backdrop of deep space. This is where different coloured phosphorescent paints really come into their own.
Use NASA space photography as a reference if you want a realistic starting point, or simply invent your own galaxy. Lightly sketch out the general shapes on the ceiling in pencil, then paint in the broad masses of colour using a sponge or wide brush. Blend where the colours meet to create depth and that characteristic soft-edged quality of galactic imagery. Do not aim for precision at this stage — cosmic landscapes are inherently fluid and organic.
4. Add Constellations and Nebulas
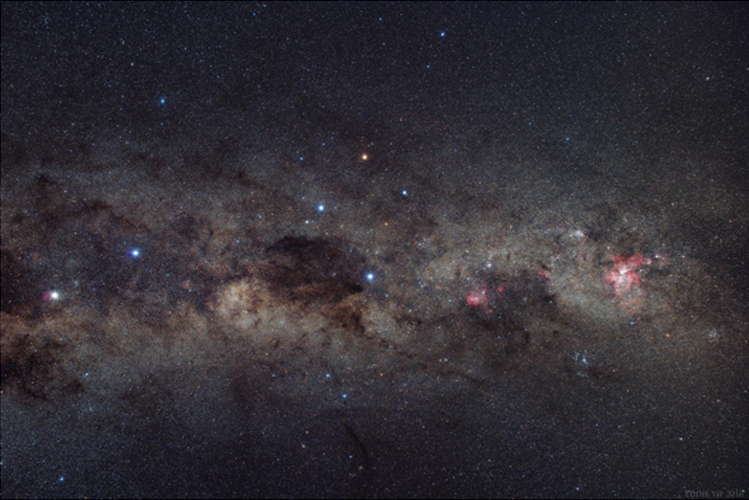
Source: Eddie Yip — Flickr
Once your backdrop has dried, it is time to add the detail that brings the mural to life.
For accurate constellations, print a star map and divide it into sections that correspond to sections of your ceiling. Plot the star positions lightly in pencil, then use a ruler and a fine brush to paint thin lines between the stars to form the constellation shapes. Once the lines are dry, paint the stars themselves as slightly larger dots using a round brush — vary the sizes to give the impression of depth and distance.
For nebulas, mix two or three colours of phosphorescent paint together and apply a small amount to the ceiling with a brush. While it is still wet, use a gloved finger to rub and blend the paint in soft, circular motions, creating the look of gaseous clouds of light. The imperfection here is the point — nebulas are nothing if not beautifully irregular.
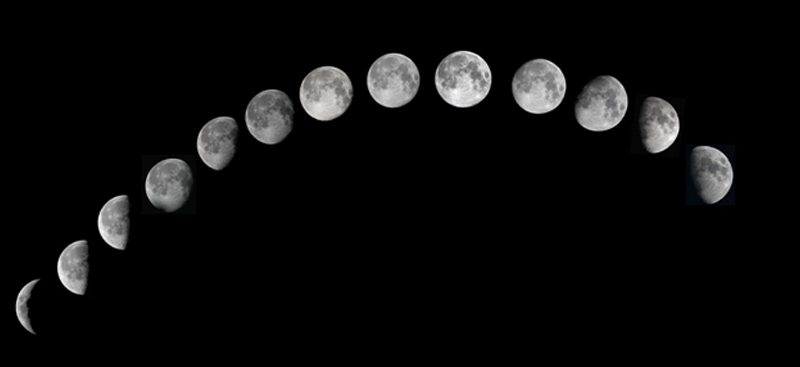
For an additional touch, try adding moon phases using a stencil and a sponge. Dab lightly around the edges of each phase to give it a soft, diffused glow.
5. Fill in the Stars
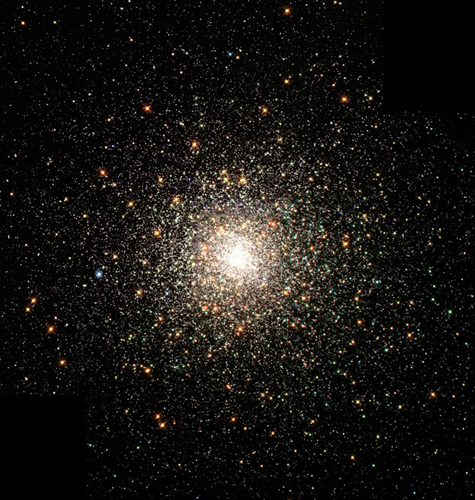
Source: NASA — Unsplash
With the large-scale elements in place, finish the mural by populating the remaining areas with stars. This is one of the most satisfying parts of the whole project.
Dip an old toothbrush or dry paintbrush into a small amount of phosphorescent paint. Hold the brush close to the ceiling surface, then run your thumb or a finger firmly across the bristles to flick fine drops of paint upwards, creating a natural scatter of tiny stars. The less paint on the brush, the finer and more numerous the dots will be. Work in sections and vary the density — denser clusters in some areas, sparser in others — to create the impression of depth.
Step back regularly to assess the overall composition. The ceiling should feel full of stars without looking uniform or flat.
6. Seal the Finished Mural
After all the creativity and effort you have invested, the final step is to protect your work so it lasts.
Apply a coat of Nippon Paint Aqua Primer Sealer Undercoat over the finished mural before adding any protective topcoat. This water-based, all-in-one pre-coat is formulated with a special acrylic polymer that provides excellent adhesion and strong resistance to moisture and alkali — both common concerns for ceilings, particularly in Singapore’s humid climate. It is suitable for interior masonry surfaces including plaster and concrete ceilings, dries within two hours, and has a low odour that makes it comfortable to use in an enclosed bedroom space. Once it has dried fully, apply a clear protective topcoat to lock in the mural and enhance its longevity.
A Few Final Tips
If this is your first time attempting a ceiling mural, spend a little time practising the flicking and sponging techniques on paper before committing them to the ceiling. It will help you get a feel for how much paint to use and how the effects will look at scale.
Divide your ceiling into sections and work through them methodically — it is far less overwhelming than trying to tackle the whole ceiling at once, and it helps you maintain consistent density and colour balance throughout.
When you are done and the lights go off for the first time, the effect is genuinely magical. Few home improvements are more rewarding than lying back and watching your own private universe take shape above you.
5 Tips for Choosing a Bedroom Paint Colour That Suits Your Personality