
You’ve decided to throw a last-minute party but realised that your house is in a mess. Getting it cleaned before your guests arrive seems like an impossible task. Don’t let this dampen your spirits! With the right tools and techniques, you can tackle the mess and transform your home into an inviting environment in no time.
Our guide on how to clean your house in one day will help you to tidy up your house efficiently. We’ve also prepared a checklist to help you keep track of your progress and highlight some ways you can minimise dirt buildup at home.
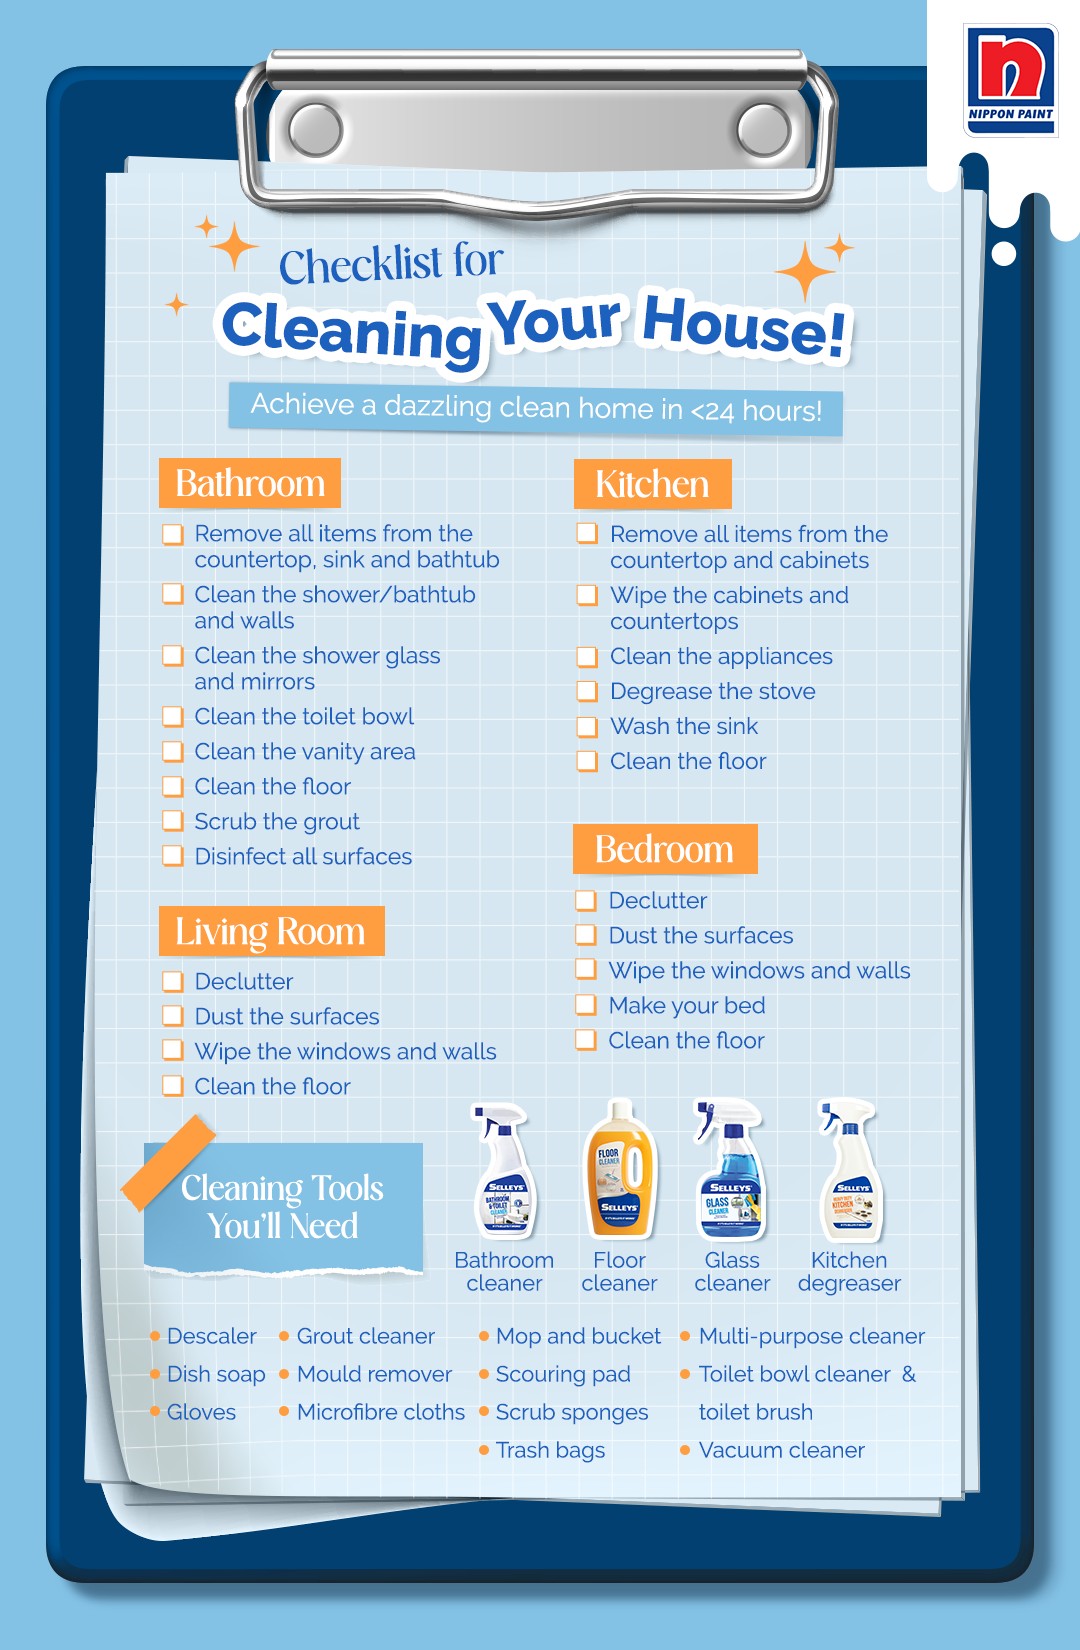
Checklist for Cleaning Your House in One Day
Not sure about the order of cleaning your house? With our cleaning checklist, you’ll know exactly which areas to tackle first.
Cleaning Tools
Here are some essential cleaning supplies you should prepare:
- Bathroom cleaner
- Descaler
- Dish soap
- Floor cleaner
- Glass cleaner
- Grout cleaner
- Kitchen degreaser
- Mould remover
- Multi-purpose cleaner
- Gloves
- Microfibre cloths
- Mop and bucket
- Scrub sponges
- Scouring pad
- Toilet bowl cleaner and toilet brush
- Trash bags
- Vacuum cleaner
How to Clean Your House Efficiently in One Day
We recommend starting with the bathroom and kitchen. These wet areas tend to take a longer time to clean due to the buildup of grime, soap scum and grease. The living room should come next since it’s typically a large space that requires more cleaning. Bedrooms are often smaller and less cluttered than other areas of the house, so they can be cleaned last.
Bathroom
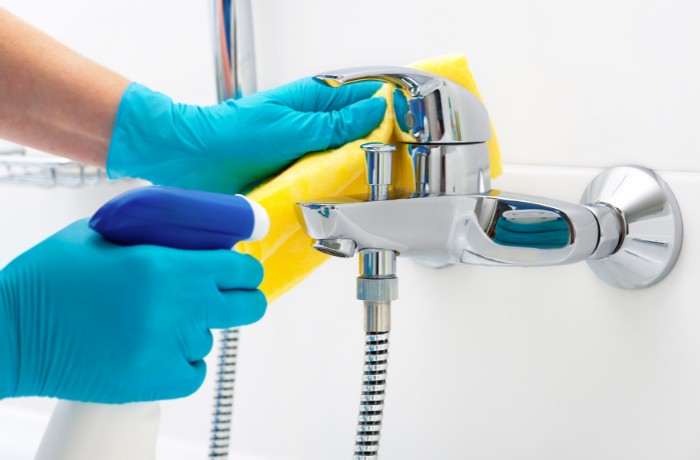
Estimated cleaning time: 1 – 2 hours
Bathrooms are often the most time-consuming areas of the house to clean. It’s prone to bacteria and mould which can be difficult to remove. By following the steps below, you can ensure that your bathroom is hygienic and germ-free.
- Step 1: Remove all items from the countertop, sink and bathtub
Remove items such as rugs, towels and toiletries before you start cleaning. You’ll be able to clean the surfaces thoroughly without these items getting in your way.
- Step 2: Clean the shower/bathtub and walls
Soap scum and stains in the shower area and bathtub aren’t easy to remove. Selleys Bathroom & Toilet cleaner can make a big difference in the efficiency of your cleaning. It’s formulated to dissolve dirt, stains, and soap scum quickly so you don’t have to spend hours scrubbing.
Simply apply the cleaner to the affected areas and let it sit for 5 minutes before wiping it away with a scouring pad. For tough stains, increase the amount of cleaner and let it sit for about 30 minutes.
- Step 3: Clean the shower glass and mirrors
Use a microfibre cloth to remove any dust and dirt particles from the surface. Next, apply a cleaning solution specifically designed for glass surfaces, such as Selleys Glass Cleaner. It’s safe to use on all glass surfaces and doesn’t leave behind any watermarks. In addition, it forms a protective layer that helps to reduce the buildup of dust particles.
Spray it on the area you’re cleaning and wait for 1 to 2 minutes. Wipe it away with a clean sponge and you’ll get a sparkling clean surface that’s free of dirt and stains.
- Step 4: Clean the toilet bowl
Cleaning the toilet bowl can be a tough and unpleasant task but a toilet cleaner can make it easier. Selleys Toilet Cleaner contains powerful cleaning agents that can eliminate tough stains and buildup in the toilet bowl.
To remove normal stains, squirt the cleaner around the inside of the toilet bowl and wait 2 minutes before flushing it away. For stubborn stains, let the cleaner sit for about 5 minutes before scrubbing with a toilet brush. Finally, flush the toilet to rinse away the cleaner.
- Step 5: Clean the vanity area
To clean the vanity area, we suggest using a multi-purpose cleaner that’s safe to use on the material of your countertop and sink. Selleys Multi-Purpose Cleaner can be applied to a variety of surfaces such as marble, wood and ceramic. Spray it on the surface and wipe it off with a clean microfibre cloth. No rinsing is required so you don’t have to spend additional time washing off the cleaner.
- Step 6: Clean the floor
Mopping with water alone may not be sufficient if you want to clean your toilet floor thoroughly. You should use a floor cleaner that’s formulated for the type of bathroom flooring you have.
Selleys Floor Cleaner can be used on most floor types, including marble, ceramic and stone. The gentle but effective formula can tackle tough stains, leaving your floors looking clean and fresh. In addition, it dries quickly and doesn’t leave behind any watermarks.
- Step 7: Scrub the grout
Over time, dirt, grime and other types of buildup can accumulate in the spaces between the grout lines. A grout cleaner such as Selleys White For Life Tile & Grout Cleaner can help to restore the appearance of your grout. It can penetrate and eliminate stubborn soap scum and substances that would otherwise be hard to remove.
In addition, the grout cleaner forms a protective, water-repellent layer that keeps your grout lines free from unwanted buildup.
- Step 8: Disinfect all surfaces
Lastly, spray some disinfectant to ensure that all germs and bacteria are killed. Be sure to follow the instructions on the disinfectant bottle, including any safety precautions.
Kitchen
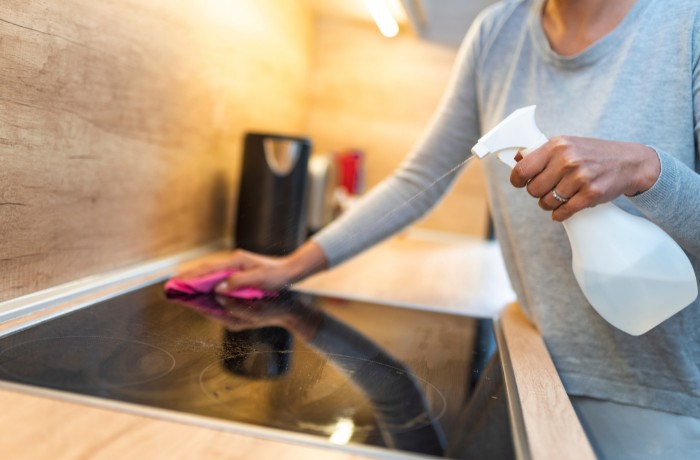
Estimated time: 1 hour
The next area you should focus on is the kitchen. It’s prone to food spills, grease and other forms of buildup that can accumulate over time, making it challenging to remove. Here are the steps to effectively clean your kitchen, ensuring that every surface is covered.
- Step 1: Remove all items from the countertop and cabinets
Begin by removing any unnecessary items from your countertops, cabinets, and drawers. Put away any dishes or utensils that are not in use and discard any expired or unused food items.
- Step 2: Wipe the cabinets and countertops
Use a good quality cleaning solution to clean countertops and cabinets, such as Selleys Liquid Sugar Soap. The solution is formulated to cut through grease and grime and is suitable for use on different materials such as ceramic, stainless steel, enamel and glass.
- Step 3: Clean the appliances
Remove items from the refrigerator and place them in a freezer while you do the cleaning. Next, spray a small amount of Selleys Multi-Purpose Cleaner on the interior surfaces of the fridge and wipe it off with a clean cloth. Don’t forget to wipe the exterior of the fridge, including the handles and door seals.
For smaller kitchen appliances, dish soap and water should do the trick. If you noticed that there are limescale and calcium deposits in appliances like the kettle and coffee mixer, Selleys Multi-Purpose Descaler can break down these stubborn scales. The gentle formula is free of harsh chemicals, reducing the risk of damage to your appliances.
- Step 4: Degrease the stove
Grease and grime that have accumulated on the stove and kitchen surfaces can be hard to remove. Selleys Heavy Duty Kitchen Degreaser can do the job. The powerful degreaser can eliminate tough grease and grime from your stoves and the kitchen hood, making it easier to clean your kitchen.
- Step 5: Wash the sink
Use a disinfectant cleaner to clean the sink and tap. If needed, use a small brush to scrub the drain. For tougher stains or buildup, spray Selleys Multi-Purpose Cleaner Spray onto the area and leave it for 10 seconds before wiping it off.
- Step 6: Clean the floor
Use a broom or vacuum to remove any debris from the floor. Choose a suitable floor cleaner that’s appropriate for the type of flooring in your kitchen and follow the instructions on the label. After mopping the floor with the cleaner, use a clean, wet mop to remove any residue and excess water from the surface.
Living Room
Estimated time: 2 – 3 hours
Not sure how to begin tidying your living room? Follow the steps below for a thorough and effective cleaning.
- Step 1: Declutter
Begin by removing any clutter from the living room, such as books, magazines, and toys.
- Step 2: Dust the surfaces
Start by dusting high surfaces like shelves and light fixtures. After that, move on to the furniture and other decorations. In this way, any dust or dirt that falls to the ground will be picked up during the final sweep or vacuuming.
- Step 3: Wipe the windows and walls
Use a cleaner that’s designed for cleaning glass to prevent damage or scratches on the windows. Wipe the walls with Selleys Liquid Sugar Soap to remove any oil and dirt buildup.
Tip!
With washable paints such as Nippon Paint’s Odour-less Ultra Durable and 3-in-1 Medifresh paint, you can clean your walls without worrying about damaging the paintwork. They are designed to be washable and stain-resistant, so you can clean your walls with just a damp cloth
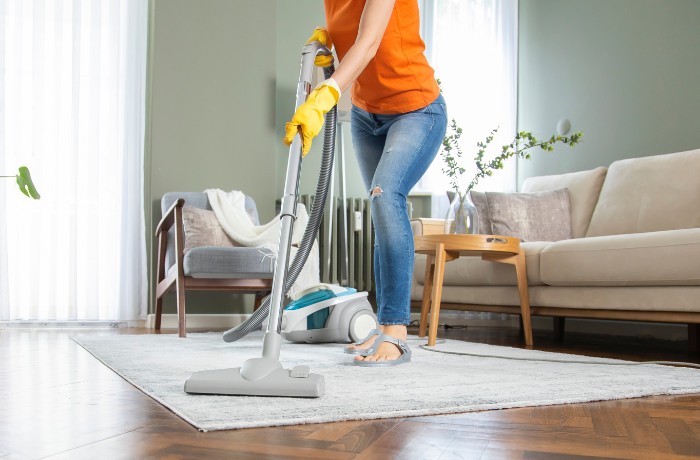
- Step 4: Clean the floor
Vacuum the floor to remove any loose debris. Once you’ve done that, mop the floor to remove any spills or stains. Remember to select the right product for your specific type of flooring to achieve the most effective cleaning result.
For example, wooden floors should be cleaned with a cleaner specifically designed for wood, such as Selleys Timber Floor Cleaner. Aside from eliminating dirt and grime, it can help to restore the natural shine of your wood flooring.
Bedroom
Estimated time: 1 hour
From decluttering to mopping, we’ll take you through the steps of cleaning your bedroom.
- Step 1: Declutter
Start by picking up any items that are out of place and returning them to where they belong.
- Step 2: Dust the surfaces
Before you begin dusting, cover your bed with a plastic sheet or blanket. This will prevent dust from landing on your bed. Start with dusting the higher surfaces first, such as ceiling fans and light fixtures. Work your way to the shelves, tables and other furniture.
- Step 3: Wipe the windows and walls
Spray the appropriate cleaning agent on the surfaces and use a microfiber cloth to wipe it off. Dry it with another clean piece of microfiber cloth or leave them to air dry.
- Step 4: Make your bed
Remove the plastic sheet or blanket carefully to prevent dust from getting onto the bed. Straighten out the bed linens and fluff the pillows to make the bed look neat. If you have a comforter or duvet, simply lay it over the bed and smooth it out.
- Step 5: Clean the floor
Use a vacuum or a broom to remove dirt and dust from the floor, making sure to reach under the bed. Lastly, mop the floor to remove any remaining dust or debris.
Tips for Cleaning Your House
These are some tips you can follow to make cleaning your home more efficient:
- Declutter before you clean to remove unnecessary items that might get in the way or create obstacles while cleaning.
- Start by dusting any light fixtures, shelves, or other high surfaces, and work your way down to the floor. This will help prevent dirt and dust from falling onto areas you’ve already cleaned.
- Use microfiber cloths to pick up dirt and dust instead of a feather duster. The latter can stir up dust and create a mess.
- Use the right cleaning products to make cleaning a breeze and prevent damage to the surfaces.
Ways to Prevent the Buildup of Dirt and Bacteria in Your House
By taking some preventive measures, you make it easier to clean your house in the long run.
Use Surface Treatments
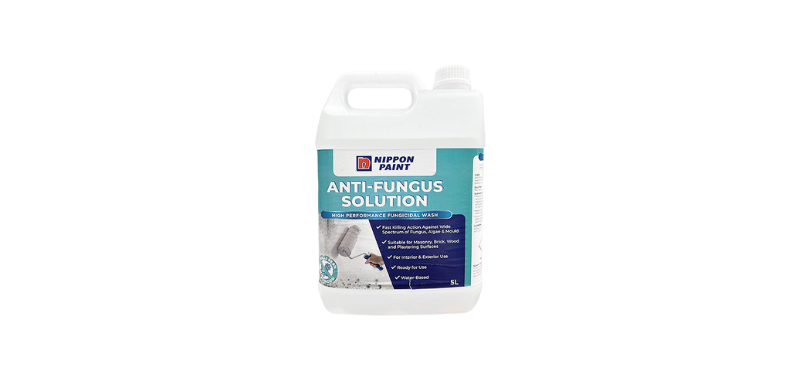
Before painting your walls, apply surface treatments such as Nippon Paint’s Anti-Fungus Solution to eliminate fungus, mould and algae. It can be applied to places like your bathroom walls where mould and fungal growth are likely to occur.
Use Anti-bacterial Paint

Anti-bacterial paint is designed to inhibit the growth of bacteria, mould and other microorganisms on surfaces. Consider refreshing your walls with Nippon Paint’s 3-in-1 Medifresh paint that prevents the growth of many types of bacteria including Methicillin-resistant Staphylococcus aureus (MRSA). This helps to improve hygiene in your home and reduces the need for frequent cleaning.
Clean Spills and Stains Immediately
Wipe up spills and stains as soon as they happen to prevent them from setting in and becoming harder to clean later.
Establish a “No Shoes” Policy
Shoes can track in dirt and debris from the outdoors. Ask family members and guests to remove their shoes before entering the house.
Clean Regularly
Develop a cleaning schedule that includes daily, weekly, and monthly cleaning tasks.
FAQs About Cleaning Your House in One Day
What is the hardest part of the house to clean?
The bathroom. The presence of moisture, grime, and soap scum makes it the most difficult place to clean.
How can I make cleaning my house more efficient?
Start by decluttering and organising your belongings, and then use the right tools and cleaning products for each task. In addition, try to clean from top to bottom and work in a logical order to avoid repeating tasks.
How long will it take to clean my house?
This depends on several factors, such as the size of your house, the level of cleaning required, and the number of people helping with the cleaning.
Generally speaking, it takes around 2-3 hours to clean a small apartment or a studio. For a larger house or a multi-story home, it may take several hours or even an entire day to clean, especially if there is a lot of clutter, dust, or grime that needs to be removed.
How to Prevent Dengue: 6 Ways to Stay Safe and Keep Mosquitoes at Bay